Into THIS! A totally awesome play kitchen! Are you amazed?! :) Keep reading...
 Here are some of the supplies you will need to complete this project. And the prices are listed next to it.
A two-drawer nightstand... we bought it at DI for 15$.
An old faucet... bought on ksl.com classifieds for 10$ (Search under the word "faucet")
A funky bowl... or you could use a square cake pan. 2$ at DI
Wooden coasters for the burners, painted black. 10$ at Bed, Bath, and Beyond
Handle, hinges, chain... 10$ total at Home Depot or any hardware store
Thick wooden dowel for hanging the curtain... FREE, my grandpa had one lying around.
Curtain material... too cheap to figure in. :)
Paint... 15$ at Home Depot
Extra piece of wood for backsplash... FREE, my uncle had wood lying around.
Knobs to go into backsplash (not shown)... 5$
Velcro to secure oven door... 1$
Total Cost: about 70$, a steal in my opinion, but you could make it even cheaper if you had an eye for good deals. You could paint burners on, use an upside down wooden letter J for the faucet (as seen in other tutorials), or go cheaper on the paint and hardware. I personally love the real faucet and burners though. Okay now for some pictures along the way. These instructions won't be incredibly detailed but it's easy enough to figure out I think. If you have questions, let me know.
 Start by knocking the sides off the drawer you plan on using for the oven.
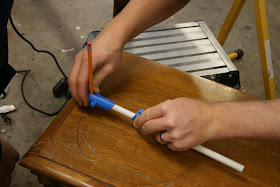
 Draw a circle to fit your bowl. I recommend getting a bowl with a pretty good size lip on it so you have some wiggle room.
 From here, there was A LOT of sanding. Fortunately it didn't take near as long with four people helping and plenty of sanding tools. Much thanks to my gracious uncle and cousin who were so happy to help us!
 It looked like this after all that sanding.
 Now for my big contribution! Painting!
 Cutting the wood piece for the back splash. After this, we nailed it to the back, let the paint dry overnight, and added all the hardware: hinges, handles, faucet, bowl, burners, etc. We used silicone caulk to secure the bowl and a nail gun to keep the burners in place.
To hang the curtain, we drilled a hole through one side of the nightstand and slid it in. We then drilled a small hole on the other side to secure it. Slide your curtain on and then put wood filler in the small hole on the side. Re-touch the paint.

That's it! We plan on adding knobs to the backsplash and some velcro in the oven to keep it shut tight. I admit the project was quite a bit more work than say... going out and buying a play kitchen... but I am so happy with the end project and hopefully my kids can pass it down to their kids!
 If any of you readers decide to make one, please send me pictures! I would love to see what you came up with.

Wow Megan that is seriously the CUTEST thing I've ever seen. You are quite the crafter!
ReplyDeleteThis is adorable. I absolutely love it!!!
ReplyDeleteCute!
ReplyDeleteLove this! (At the risk of sounding blonde, what is "DI"?)
ReplyDeleteSorry to not elaborate in the post but DI is Deseret Industries. It's a thrift store really common in Utah.
ReplyDeleteI am making one for my daughter in the next week or so, we just found a suitable nightstand sitting out for the dump at a friends house just the other day! So excited :)
ReplyDeleteFun Learning... take a picture! I would love to see it.
ReplyDelete