8.26.2011

DIY Fabric Art

I found this fabric a while ago and I LOVE the colors. I have been trying to decide just what to do with it. I knew I wanted something for our living room, but I wasn't sure what, until this idea came to me. 

All you need:
         A frame
         Fabric strips
         Sewing machine or your could use hot glue or fabric glue
       
The first thing I did was paint and distress my frame, it was boring old black, so I painted it red, distressed it and then finished with a glossy clear coat.

Then I cut a piece of cardstock that was same size as my frame and I cut strips the width of the cardstock. My fabric was already in strips because it was part of a jelly roll pack, but I did cut some of the strips thinner. Then lay out the strips so you can get the look you like.

Then start sewing (or glue) the fabric strips to the cardstock. Layer the next strip and sew and so on until the cardstock is covered.


Slip it into your frame and you are done! This could totally be done with just scraps and what it in your stash. Hope everyone has a great weekend!

8.19.2011

T-shirt Makeover….

IMG_0113I found this T-shirt at K-mart for 50 cents, I loved the color, but it was too big, but I thought I could do something with it. This is what I came up with.IMG_0099
The first thing I did was fold it in half and press with the iron, then I unfolded it and cut the front along that line. IMG_0100IMG_0102
Then I took fabric from a jelly roll that I had on hand, measured the length of the cut front + seam allowance and cut 4 pieces that length. With right sides together, sew two together the long way, and then the other two together the long way and press open.
Press over a little bit (I did about a 1/2 inch) toward the wrong side of these then fold wrong sides together and press the long way. This helps everything lay better in the next steps.
I wanted to have another little accent piece so I measured another length of fabric, then pressed it in half to make the orange stripe.
IMG_0103IMG_0105
Now you make a sandwich using all the pieces. First, the first the large accent piece, then the edge of the shirt you cut, then the small accent piece, and finally the other half of the large accent piece. Then pin everything together and sew along the edge of the large accent piece. I sewed 2 lines because I like how that looks, but you can do whatever you would like.
Then repeat with the other half of your shirt.
IMG_0106IMG_0108
I wanted buttons the entire way down, it is just a preference. You could do 2 buttons like a cardigan or use snaps or just leave it open if you want, but I really REALLY like using my button hole foot on my sewing machine and I like sewing on buttons on my machine, it is so fast and fun. (I need to get our more, I know.)
IMG_0109IMG_0112
I measured where I wanted button holes, then used my sewing machine to sew them.
Then I marked and sewed on my buttons, trimmed the threads and all done. I like how it turned out, it fits nicely now that I took a little out and the button flaps overlap. Keep an eye out for clearance shirts…. I bet this could be used on a sweater too…. I let you know if I try it, have a great day!
IMG_0116


8.12.2011

To Do List

I am a list person. I like to check things off lists, but mostly I like to look back and see all things I got accomplished or what didn’t get done because I decided to play Rescue Heroes with my boys.
Unfortunately, most of my lists ended up on the back of envelopes, scrap paper or whatever else was handy. Here is an idea for a reusable/dry-erase To Do List that is cute enough to leave out all the time and maybe I will get more things done on the list because it is so cute!
IMG_0401
The first thing is I got this downloadable printable from somewhere and I have been searching and searching trying to find where is came from and I can’t find it again, so if you find it or know who made it let me know so I can link them and give them credit. There are TONS of printable To-Do lists out there or you could make your own.
The frame had been lying around for years, it was just plain wood and I didn’t really like it, but I knew I would find something to do with it (do you have things like that?)  So first thing I painted it glossy red, probably 3 or 4 coats, once dry I took sand paper to it. (I know the picture is blurry, but I wanted to show the distressing, I think our camera is about to die, it keeps acting weird)
IMG_0404
Then I just slipped the To-Do List behind the glass and put the whole thing back together. I already have dry-erase markers handy for use on our calendar, from here, so I am ready to start checking things off my list!
IMG_0407

7.29.2011

FONTS FONTS FONTS!

I LOVE fonts! I have HUNDREDS (probably THOUSANDS) of fonts on my computer and I LOVE finding new ones and thinking of projects to use them for. I use fonts to make cute additions to homemade cards, handouts for church, adding text to pictures in Photoshop, printables, making iron-on's for t-shirts (LOVE IT!), and of course using Sure Cuts A Lot and my Cricut to cut vinyl or freezer paper for stencils. The possibilities are ENDLESS!

What do I love more that cute fonts? FREE ONES! That is right, FREE! There are plenty of places where you can purchase fonts, doodlebats & SVG's, but there are some great places to  get free ones and really FREE is better.

Here are some links to some of my favorite places to find FREE FONTS:


7.26.2011

Games with the kids

I do wish I had a more sophisticated project to present today but for now this will have to do until I can get to the antique store for something more fascinating!

But until then-this is a project I came up with my oldest daughter to help entertain us one afternoon. We received something in the mail in this narrow long box which is perfect to use for this project. A wider box would also work though.
Then we cut different shaped holes in the box.

And now we can throw little bean bags in it for a bean bag toss. Surprisingly this game was pretty fun for the kids and the box can certainly be dressed up and painted. The kids love painting so if they can participate it is more fun.

With the excess we built these little cardboard books and the kids loved these as well. They made their own stories in them.


Again, apologies for the lack of sophistication but if you ever find yourself bored at home with the kids and need a fun craft with the kids this worked wonders for us!


7.20.2011

Table Runner


I have wanted to make a table runner for a while now. I was looking online at different ideas and found one here I was really pleased with mine and it didn't take very long to put it together; 3 hours maybe from cut to finish. I may have to make one for each holiday now so I can decorate.

Materials
Solid Color canvas: 5/8 yard
Print canvas: about 3/4 yard total, I bought 4 different coordinating fabrics, each 7" wide and it was enough to make 2 runners
2 1/2 yards of 1/2"-wide rickrack trim
Thread in coordinating color

Finished Measurements: Approximately 14" wide X 41" long

Cutting Instructions
Out of the solid, cut 42 x 20. Each print fabric should be cut to 6 1/2" x 9".

Sewing Instructions
With right sides together, sew the print fabrics together along the 9" side with 1/4" seam allowance. Do this with each rectangle until they are all connected. Press seams open.


Topstitch the seam allowance down on each side of the seam, 1/8". You can kind of see the end result in this the picture below.


Now on to your solid fabric. Along the 42" edge (the longest edges), attach your rick rack to the right side of the fabric. Line the end of the rick rack up with the edge of your solid fabric. Sew 1/8" from edge as shown in the photo below. Do this on both long sides.


With right sides together, align the printed fabric with the edge of the solid fabric; the rick rack will be in the middle. Stitch 1/4" from the edge. Do this to both sides; it will create a tube.


Press the seam allowance toward the printed fabric (center panel), then turn the runner right sides out. Press the seams and rick rack again. You want the rick rack to go towards the solid fabric. Be careful not to iron the edges of the solid fabric and create a crease. I had trouble getting the crease out.


Topstitch along the long seams, across from the rick rack. DON'T SEW THE BACK TO THE FRONT IN THIS STEP. It's kind of difficult to scrunch all the fabric up to top stitch. Just go slow and be patient.

Turn your work inside out again and center the print fabric so there is 3" of solid canvas on each side fo the palen. Align and pin the short end of the runner and sew across the end with 3/4" seam allowance. Repeat for other end, leaving 5" open for flipping. Flip right sides out and press the edges, measuring again so there is 3" of solid fabric along the length of the runner.

Fold in and pin the seam allowance at the 5" opening. I liked the runner I made that wasn't topstitched around the runner. You may choose to top stitch 1/8" from the edge around the entire runner. OR I chose to whip stitch the 5" opening closed.

7.15.2011

Dresser Re-Do....

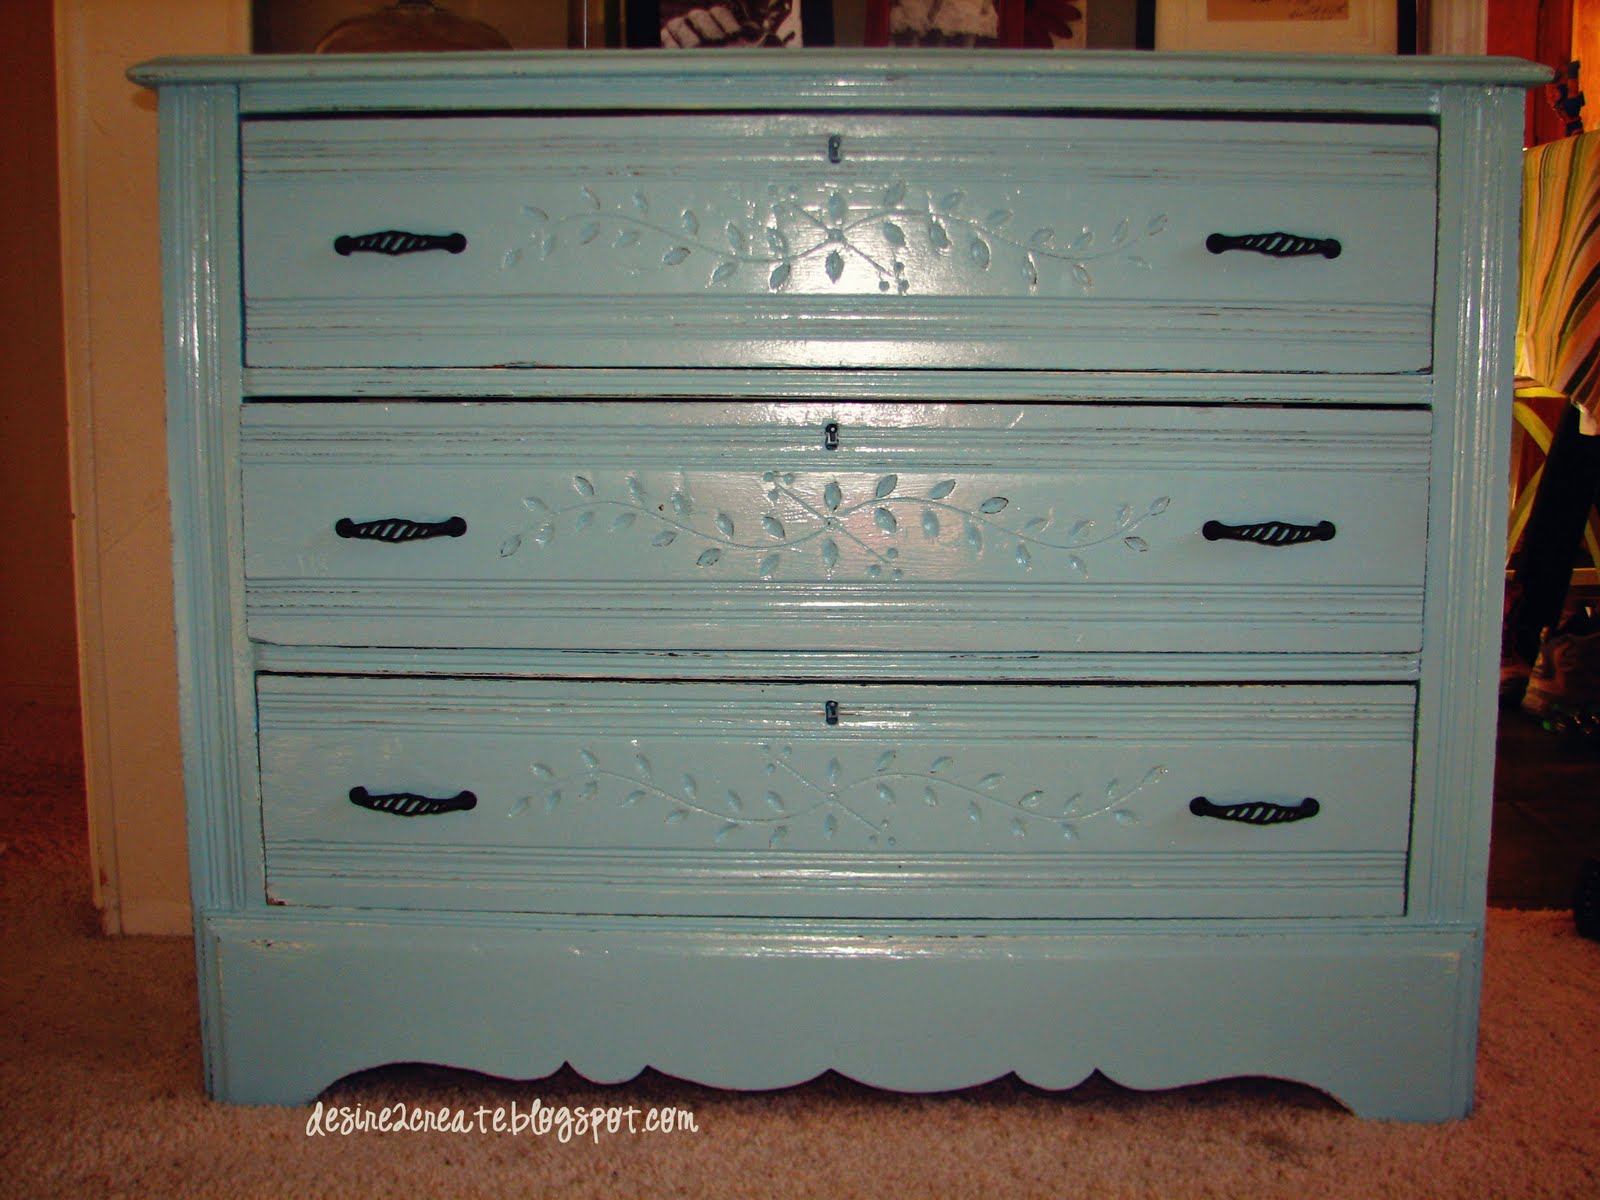
I found this dresser at the D.I. (Deseret Industries, a donation/thrift store) and fell in love with it. It needed some love, but I had a vision and I LOVED the price.


I fell in love with the decorative details, the carved leaves on the front of the drawers and the trim on the bottom. The first thing I did was take off the handles, then I started sanding and filling and repairing. Some of the drawers needed some repairing. Then I started priming. I primed everything really well. Using KILZ white primer. 
 After it was all primed, I started painting. I actually used spray paint (KRYLON, Blue Ocean Breeze, Gloss). I used a lot of thin coats to prevent drips and I let it dry well between each coat. Here is a picture of it painted and waiting to be distressed.
 Next, I took sandpaper to distress the edges and details. I really wanted the dress to still look old and so I didn't sand out all the imperfections before I painted.
Next, I added the new handles and moved it into our living room. I love how much this piece has changed the look of our living room, it is so bright and cheerful!

Linked Up Here: