Showing posts with label DIY. Show all posts

5.04.2012

Faux Bead Board Chunky Frame....

I have always liked the look of bead board. I've seen frames with bead board in them or made from bead board itself, but when I went to look at bead board at the home improvement store I realized I had a few problems. First, it comes in a big sheet, so I would need a big vehicle to get it home. Second, trying to wrestle it out of the truck alone once I got home. (I guess my 4 and 2 year old would be really helpful too) Third, it is really big and I wasn't sure how to cut it without having a table saw.

So, one night I was thinking about it and I came up with an idea. Make my own bead board look-a-like using paint sticks and bamboo skewers! I tried it and it totally worked! Here is a look at the finished product:
 This is an 8x10 frame, I pulled out the glass, then measured and cut the paint sticks. (I got these from Walmart, obviously, and the paint guy just gave them to me--he thought I was a little crazy, but I don't care.) I cut the paint sticks using a utility knife, just score each side and then break the end off. Same with the bamboo skewers (they come in a pack of like 100 for $1).

Then I lined them up in the frame; paint stick, skewer, paint stick, skewer.... and so on. The last paint stick had to be trimmed a little, but I just used the utility knife for that too. Then I glued them in using hot glue. Replaced the back of the frame. Then painted and distressed the whole thing.

I wanted the chunky layered frame look, but I wasn't sure how to attach the other frame to the front without making it too permanent--I like to switch out pictures a lot. And then I had a somewhat brilliant idea!
VELCRO! Yup, sticky back velcro dots. I put the scratchy side on the small frame and soft side on the faux bead board. It works GREAT! I can swap out the pictures whenever I want, the 2nd frame stays put and it was hard or complicated! I love how they turned out---I actually made 3 for our mantel.


3.03.2012

Dahlia Pillow

I have been wanting to create some new decorative pillows for our front room. Last week our youngest wasn't feeling well, so while Daddy and Brother went to visit Grandma and Grandpa I had time to work on a little something. I absolutely LOVE the way it turned out. And it was really EASY! A little time consuming, but not too bad, I had the whole thing finished in a couple hours.


What you need:
                              Felt (I had felt off the bolt, I had used it for something else, but I probably had about 1 yard         or so and I still have some left over. It depends on how big you want your pillow and how large you want your Dahlia.)
                              Pillow Form (I used a really ugly santa pillow that someone gave to us, made a perfect form and was free)
                              Scissors
                               Hot Glue Gun & Glue
                              Sewing Machine, to actually sew the pillow slipcover
                              Some decoration for the center, I used beads, but a big button or anything would work too.


First, figure out how big you are making your pillow. I simply took the ugly pillow laid it onto my felt and traced around it, then added a little for a seam allowance. This was my front. For the back you have 2 options. You could simply do the same thing again and have a completely solid pillow or you can make a slip cover. To do the slip cover I took the front I had just measured and traced it again, then added extra for over lap and seam allowance, about 3 1/2 inches, but only to ONE side. Then I simply folded that piece in half and cut along the fold making 2 equal halves.

**here is where I would do something different. I created my Dahlia first and then sewed the slipcover together, it worked but was extra tricky not to sew over the petals, so in the future I would quickly sew the slipcover together.

               1. Take the back halves and gently fold over just a bit and sew. This is the part where you slip your pillow form in and out, so it needs to be finished.
                2. Then lay both back halves onto your front piece, making sure that the outside corners are perfectly aligned. The back pieces will be bigger, so align the outside corners and then put one side of the halves under and the side over and pin around.
               3. Sew the entire way around the pillow, remember to back stitch. Clip the corners, turn right side out.


Now for the fun part. I traced a circle using a dinner plate where I wanted my Dahlia to be. I didn't want it center for a couple reasons, I was worried that it might become slightly offer center and drive me crazy and I actually really like the offer center look.

Then cut your triangles. Bigger for the outside and then getting slightly smaller as you work toward the center. I experimented a little, until I had about the size I wanted, but mine are not all the same or perfect. I just quickly cut triangles about the same size.


To make the petal, fold one bottom corner in to the center and glue (JUST A LITTLE GLUE) and then fold the other petal into the center and glue. And that is one petal. Then glue it onto your slipcover along the line you made. And repeat working slowly inward, until you get to the center and add your embellishments. I used beads and just hand sewed them on.

Slip your pillow form inside and you're done!

11.29.2011

Christmas Ornaments

Growing up with 8 siblings required our family to be a little creative when it came to finances. One thing my mother did was make our Christmas ornaments. I really enjoy having a very beautifully decorated tree (that matches) and looks gorgeous but sometimes it is fun to have a very personalized Christmas tree. The great thing about looking at a very homemade Christmas decorated tree is that floods of memories and good times come back when you look at it every year. So for this post I'll be showing you how to make your own group of choir singers from soda pop cans. The other cool thing about this particular ornament is you can make each individual choir member look like each member of the family. I didn't think of that until after I made these so they don't really look like anyone I know-they're just and interesting group of people!
I started with a 6 pack of sodas. The easy part-drink them. They must be empty. Then rinse them out.
Then, step on them sideways like this. (above) They work best if you can manage to get the bottom of the can to not be seen but I really can't give any tips on how to get them to turn out any specific way (as you can see...)
Then I painted them a solid color. If you want the choir to match that is fine. I went with Orange, black, green and brown. I painted the faces peachy color for skin.
Then using a sharpie I drew in facial expressions. I also colored hole that you drink out of pink (or red) to mimic the inside of the mouth.
Then I added hair (all brown yarn). You can use whatever color you choose for hair.
A last detail I added was choir books complete with a song and notes.
I planned to give these to some friends so I wrote 'Merry Christmas from our family to yours, Dec. 2011' on the outside of the choir book.
I also used green felt to cut out circles for their hands (they are wearing green mittens)
This is a fun project, I let my 3 yr old paint her own but the older kids get the more creative they get with their details. It would make a fun night of family time! I hope you enjoy. Happy Holidays!

8.26.2011

DIY Fabric Art

I found this fabric a while ago and I LOVE the colors. I have been trying to decide just what to do with it. I knew I wanted something for our living room, but I wasn't sure what, until this idea came to me. 

All you need:
         A frame
         Fabric strips
         Sewing machine or your could use hot glue or fabric glue
       
The first thing I did was paint and distress my frame, it was boring old black, so I painted it red, distressed it and then finished with a glossy clear coat.

Then I cut a piece of cardstock that was same size as my frame and I cut strips the width of the cardstock. My fabric was already in strips because it was part of a jelly roll pack, but I did cut some of the strips thinner. Then lay out the strips so you can get the look you like.

Then start sewing (or glue) the fabric strips to the cardstock. Layer the next strip and sew and so on until the cardstock is covered.


Slip it into your frame and you are done! This could totally be done with just scraps and what it in your stash. Hope everyone has a great weekend!

8.19.2011

T-shirt Makeover….

IMG_0113I found this T-shirt at K-mart for 50 cents, I loved the color, but it was too big, but I thought I could do something with it. This is what I came up with.IMG_0099
The first thing I did was fold it in half and press with the iron, then I unfolded it and cut the front along that line. IMG_0100IMG_0102
Then I took fabric from a jelly roll that I had on hand, measured the length of the cut front + seam allowance and cut 4 pieces that length. With right sides together, sew two together the long way, and then the other two together the long way and press open.
Press over a little bit (I did about a 1/2 inch) toward the wrong side of these then fold wrong sides together and press the long way. This helps everything lay better in the next steps.
I wanted to have another little accent piece so I measured another length of fabric, then pressed it in half to make the orange stripe.
IMG_0103IMG_0105
Now you make a sandwich using all the pieces. First, the first the large accent piece, then the edge of the shirt you cut, then the small accent piece, and finally the other half of the large accent piece. Then pin everything together and sew along the edge of the large accent piece. I sewed 2 lines because I like how that looks, but you can do whatever you would like.
Then repeat with the other half of your shirt.
IMG_0106IMG_0108
I wanted buttons the entire way down, it is just a preference. You could do 2 buttons like a cardigan or use snaps or just leave it open if you want, but I really REALLY like using my button hole foot on my sewing machine and I like sewing on buttons on my machine, it is so fast and fun. (I need to get our more, I know.)
IMG_0109IMG_0112
I measured where I wanted button holes, then used my sewing machine to sew them.
Then I marked and sewed on my buttons, trimmed the threads and all done. I like how it turned out, it fits nicely now that I took a little out and the button flaps overlap. Keep an eye out for clearance shirts…. I bet this could be used on a sweater too…. I let you know if I try it, have a great day!
IMG_0116


7.15.2011

Dresser Re-Do....

I found this dresser at the D.I. (Deseret Industries, a donation/thrift store) and fell in love with it. It needed some love, but I had a vision and I LOVED the price.


I fell in love with the decorative details, the carved leaves on the front of the drawers and the trim on the bottom. The first thing I did was take off the handles, then I started sanding and filling and repairing. Some of the drawers needed some repairing. Then I started priming. I primed everything really well. Using KILZ white primer. 
 After it was all primed, I started painting. I actually used spray paint (KRYLON, Blue Ocean Breeze, Gloss). I used a lot of thin coats to prevent drips and I let it dry well between each coat. Here is a picture of it painted and waiting to be distressed.
 Next, I took sandpaper to distress the edges and details. I really wanted the dress to still look old and so I didn't sand out all the imperfections before I painted.
Next, I added the new handles and moved it into our living room. I love how much this piece has changed the look of our living room, it is so bright and cheerful!

Linked Up Here:

6.10.2011

Little Chair Makeover....

My Birthday was a few weeks ago, YIPPEE! While I was at soccer practice some one the ladies I work with  at church "redecorated" my house.... I came home from practice to find this:
 and this:
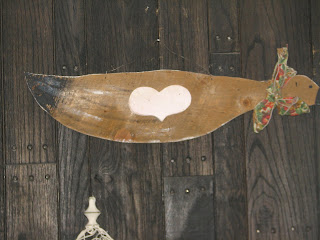
 And this (yes it is a giant wooden goose):
 and this:
and this: 
 Of all the lovely things they left for me I actually really liked this little chair and I thought with some love and new paint it would be really fun, besides my 1 year old fell in love and kept dragging it around the house.
So, the first thing I did was scrape, scrape, scrape.... then sand, sand, sand

then Prime and then I started to paint. I really wanted this to look nice, so I was patient (very unlike me) and put on thin even coates of paint and I waited until it was completely dry and I used paint I already had which made this cheap!

 Then, I roughed up the edges a little bit and now it is perfect.

***Just a note, watch for another GIVEAWAY coming soon!****

3.10.2011

Using Yeast

I have never had much luck when it comes to using yeast. That is until I sat down and read all I could about yeast to figure it out. I am still an amateur at best but I thought I would share my tips and tricks to inspire any of you out there that are also afraid of yeast.

I found this little bit of random info about yeast interesting..."Yeast... is used in baking as a leavening agent, where it converts the fermentable sugars present in dough into the gas carbon dioxide. This causes the dough to expand or rise as gas forms pockets or bubbles. When the dough is baked, the yeast dies and the air pockets "set", giving the baked product a soft and spongy texture. The use of potatoes, water from potato boiling, eggs, or sugar in a bread dough accelerates the growth of yeasts." -Wikipedia

Mel's Kitchen Cafe has an awesome tutorial on baking with yeast and it helped me sooo much! Go HERE to see that. I highly recommend it. I also found good tips at The Reluctant Gourmet.


Some of the tips I have learned and found most useful from these places and from my own practice are the following...

1) Instant yeast is a good option for beginners. I love not having to wait for my active dry yeast to proof before adding it.
2) Get your water at the right temperature. If it's too hot, it will kill the yeast. If it's too cold, the yeast won't work. My rule is to test using my wrist... I like it to be warmer than bath water but not hot enough to burn.
3) The amount of flour used in a recipe is just a basic guideline. I always thought you should follow the recipe exactly but when it comes to bread, it's important to not over flour your dough.
4) Good supplies for bread making... If you plan on making bread a lot, a mixer is a lifesaver! I LOVE LOVE LOVE my Bosch. I never knew just how wonderful it really was until I made bread. I also think that having silpat liners are wonderful.
5) Kneading the dough is very important. It takes a lot of kneading to develop the gluten. That's why the bosch is so handy! Kneading by hand can be quite therapeutic though.
6) The main ingredients for bread are... Water, yeast, flour, salt. Many recipes call for extras like eggs, milk, and vital wheat gluten. Want to know what happens to your bread when you add these? Go HERE to find out!
7) Let your bread rise in a warm place. Ben used to warm up our oven on the lowest temperature and stick it in there... it was way too hot and started cooking the bread. I put mine in a sunny place in my house with no drafts.
8) I make a batch of bread that is usually 4-6 loaves and then place the rest in plastic bread bags and freeze.

Since learning to use yeast, I have made the following: Lion House Rolls (my favorite!), bagels, bread bowls, another roll recipe, three different recipes for whole wheat bread, breadsticks, and pita wrap bread. Can you tell how much I love Mel's Kitchen Cafe? :) I loved all these recipes and have decided to try making all of our families bread items from now on. No more expensive old bread at the grocery store for us! Yay! Baking bread has become one of my favorite new hobbies. I hope these tips and tricks helped inspire you to try it out as well. Happy Baking!