
Showing posts with label Magen. Show all posts

5.04.2012

Faux Bead Board Chunky Frame....

I have always liked the look of bead board. I've seen frames with bead board in them or made from bead board itself, but when I went to look at bead board at the home improvement store I realized I had a few problems. First, it comes in a big sheet, so I would need a big vehicle to get it home. Second, trying to wrestle it out of the truck alone once I got home. (I guess my 4 and 2 year old would be really helpful too) Third, it is really big and I wasn't sure how to cut it without having a table saw.

So, one night I was thinking about it and I came up with an idea. Make my own bead board look-a-like using paint sticks and bamboo skewers! I tried it and it totally worked! Here is a look at the finished product:
 This is an 8x10 frame, I pulled out the glass, then measured and cut the paint sticks. (I got these from Walmart, obviously, and the paint guy just gave them to me--he thought I was a little crazy, but I don't care.) I cut the paint sticks using a utility knife, just score each side and then break the end off. Same with the bamboo skewers (they come in a pack of like 100 for $1).

Then I lined them up in the frame; paint stick, skewer, paint stick, skewer.... and so on. The last paint stick had to be trimmed a little, but I just used the utility knife for that too. Then I glued them in using hot glue. Replaced the back of the frame. Then painted and distressed the whole thing.

I wanted the chunky layered frame look, but I wasn't sure how to attach the other frame to the front without making it too permanent--I like to switch out pictures a lot. And then I had a somewhat brilliant idea!
VELCRO! Yup, sticky back velcro dots. I put the scratchy side on the small frame and soft side on the faux bead board. It works GREAT! I can swap out the pictures whenever I want, the 2nd frame stays put and it was hard or complicated! I love how they turned out---I actually made 3 for our mantel.


3.30.2012

The Sock Sack...

As our family has grown so has the abundance of lost socks. It drives me crazy to have all the laundry done and find I still have a basket of socks without their match. Likewise, it drives me crazy to find a dozen socks under my boys bed, behind the couch, in the sandbox, or in the bottom of my pantry! When have dirty socks ever gone in the pantry?! 

So, here is my new solution to the problem, The Sock Sack. Everyone has their own sock sack, when you take off your socks, you put both socks into your sack. When the sack is getting full, zip it closed and throw the entire thing into the washer and dryer. All pairs SHOULD be accounted for. Which SHOULD make for easy folding and putting away. And I can't even wait to try it out on tiny little baby socks!

We started this routine this week and so far it has been a hit. My boys even spent an entire morning searching for my dirty socks to put in their sack. I think I will eventually make a little fabric tag for each sack, but for right now this works great!

I found our sock sacks at Walmart in the laundry basket/ironing board aisle. These are the Mainstays Brand and they were 97 cents each. There was a Tide version, but they were like $4 each. I couldn't see any reason why these wouldn't work just as well and haven't had any trouble yet. 

Hopefully, this will simplify our sock problem, do you have any time saving laundry tricks? Have a great weekend!

3.03.2012

Dahlia Pillow

I have been wanting to create some new decorative pillows for our front room. Last week our youngest wasn't feeling well, so while Daddy and Brother went to visit Grandma and Grandpa I had time to work on a little something. I absolutely LOVE the way it turned out. And it was really EASY! A little time consuming, but not too bad, I had the whole thing finished in a couple hours.


What you need:
                              Felt (I had felt off the bolt, I had used it for something else, but I probably had about 1 yard         or so and I still have some left over. It depends on how big you want your pillow and how large you want your Dahlia.)
                              Pillow Form (I used a really ugly santa pillow that someone gave to us, made a perfect form and was free)
                              Scissors
                               Hot Glue Gun & Glue
                              Sewing Machine, to actually sew the pillow slipcover
                              Some decoration for the center, I used beads, but a big button or anything would work too.


First, figure out how big you are making your pillow. I simply took the ugly pillow laid it onto my felt and traced around it, then added a little for a seam allowance. This was my front. For the back you have 2 options. You could simply do the same thing again and have a completely solid pillow or you can make a slip cover. To do the slip cover I took the front I had just measured and traced it again, then added extra for over lap and seam allowance, about 3 1/2 inches, but only to ONE side. Then I simply folded that piece in half and cut along the fold making 2 equal halves.

**here is where I would do something different. I created my Dahlia first and then sewed the slipcover together, it worked but was extra tricky not to sew over the petals, so in the future I would quickly sew the slipcover together.

               1. Take the back halves and gently fold over just a bit and sew. This is the part where you slip your pillow form in and out, so it needs to be finished.
                2. Then lay both back halves onto your front piece, making sure that the outside corners are perfectly aligned. The back pieces will be bigger, so align the outside corners and then put one side of the halves under and the side over and pin around.
               3. Sew the entire way around the pillow, remember to back stitch. Clip the corners, turn right side out.


Now for the fun part. I traced a circle using a dinner plate where I wanted my Dahlia to be. I didn't want it center for a couple reasons, I was worried that it might become slightly offer center and drive me crazy and I actually really like the offer center look.

Then cut your triangles. Bigger for the outside and then getting slightly smaller as you work toward the center. I experimented a little, until I had about the size I wanted, but mine are not all the same or perfect. I just quickly cut triangles about the same size.


To make the petal, fold one bottom corner in to the center and glue (JUST A LITTLE GLUE) and then fold the other petal into the center and glue. And that is one petal. Then glue it onto your slipcover along the line you made. And repeat working slowly inward, until you get to the center and add your embellishments. I used beads and just hand sewed them on.

Slip your pillow form inside and you're done!

2.17.2012

Organizing Our Home: Mini Fabric Bolts & Mini-Mini Bolts

I have to confess. I have A LOT of fabric. My husband might say that I have TOO MUCH fabric, but we can discuss that another day. The biggest problem with my fabric is that all the pieces are different. Some are just left overs from another project, some are fat quarters, and some are a few yards, just waiting to be cut and sewn. It seemed that no matter how I folded and piled, it never looked or was organized. I often knew (or thought I knew) that I had a certain piece of fabric, but then I couldn't find it. Or I would tear everything apart looking for it and end up frustrated and with a bigger mess.

I have seen a number of different ideas for making mini bolts, but I had a hard time finding the materials recommended or didn't want to spend that much money.

What you need:
20 x 30 Foam Core Board (I found mine at Walmart for under $2 a board)
Jumbo Paper Clips (found at Walmart in the Office Supply section)
Ruler/Yard Stick & Pencil
Sharp Knife

I first measured and drew out the cutting lines. The Mini Bolts measured 10 inches x 5 inches. I drew out all the lines I needed to cut on and then cut along the lines with sharp knife. Then I took a piece of fine sandpaper and gentle smoothed out the rough spots and edges.

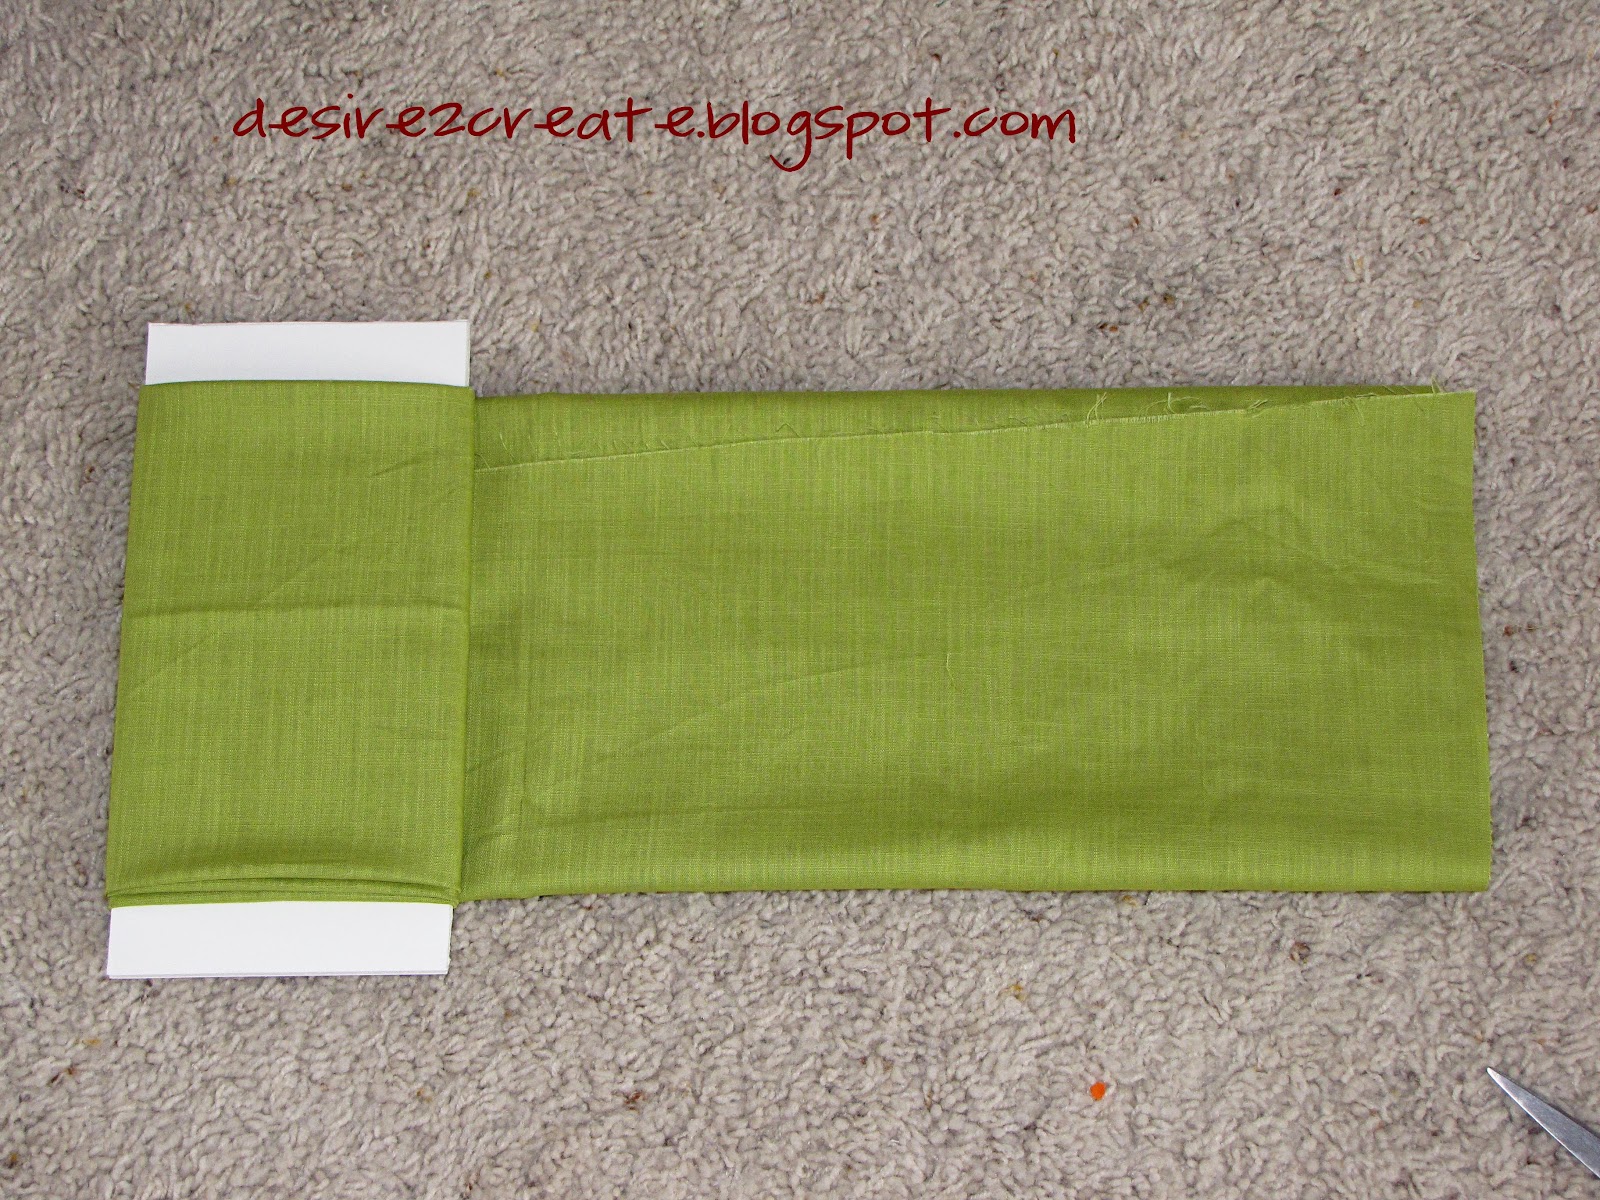
Then I took my fabric, layed it out flat, folded the raw edges to the center, and began wrapping it around one board. When I got the end of the fabric I folded the edges under and secured them to the other layers of fabric using the jumbo paper clips.


For the Mini-Mini Bolts: Draw lines that are 6 inches x 4 inches. And follow that same instructions for cutting and folding.

I found that I could fit up to about 2 yards of neatly folded cotton on a Mini Bolt and the Mini-Mini Bolts were perfect for fat quarters, 1/4-1/2 yard cuts, and smaller left over pieces.

I love how I can easily see and grab what pieces I need and how neat and tidy it makes my shelves look. And how inexpensive it turned out to be. Hope this gives you an idea of organizing your creative space, have a great weekend!

2.04.2012

Valentine Wreath....

I wanted to make a wreath for our mantel for Valentine's Day, but I didn't want to spend a lot of money or time or brain power working on something. I am really happy with how this wreath turned out and it didn't have to be 'perfect'.

Here's what you need:
Coffee Filters (They come in a huge package, this was actually left over from another project I did)
Fabric Dye (I used Tuplip Red and found it at Walmart)
Hot Glue Gun and Glue Sticks
Scissors
Wreath form, whatever size and shape you would like

FIRST: you need to dye your coffee filters. This isn't hard and it doesn't have to be perfect. I used a large plastic tub in my sink. I DID NOT use all the dye. Just a bit, until it was the color I was looking for. I put about a tablespoon of salt in the tub, then the powdered dye, and added about 2 cups of boiling water. I stirred until it was all dissolved.

You MUST WEAR GLOVES! I wore throw-away medical gloves, but it doesn't really matter what you wear, just wear gloves. I dripped some on the back of my hand and could not get it off, it is slowly fading, but still there.

Add the coffee filters to the tub of dye. Make sure that they are fully covered, move them around and let them sit for as long as you like. The longer they sit in the dye the darker they will be. I did 3 batches of coffee filters, the first I let sit the longest time, and then less time and less to get a multi-shade look. 

(Sorry there are no pictures of this, but I was home alone and I didn't want to dye my hands or my camera)

Over the tub ring out the coffee filters, they are amazingly strong and I just rung out all the excess moisture. And then place them in another dry tub or bucket (remember nothing that you love it might be dyed for a while).

Once I had all the coffee filters rung out, I threw them in the dryer. Yes, my clothes dryer. I adjusted the temp to be low-medium and then let them tumble around. But watch them, this is probably a no-no and a fire hazard, so don't leave your dryer unattended. But it only took a few minutes for the coffee filters to be fluffed and dry.

Now it is time to make the ruffley-flower things for the wreath. First, fold a coffee filter in half.
 Then cut it along the fold. Now you have 2 halves.
 Fold one half in half like this.
 Then in half again.

 Then twist the pointed end. If you don't want your wreath to be real fluffy, twist it more. If you want fluff, twist less.
 Snip off the pointy part with scissors.
 Then hold the twisted part and pull apart all the the different folded layers to look like this. Then glue it to the wreath form with hot glue. And repeat until your wreath is full. 
I added a small piece of ribbon to the back for hanging and you are done! Enjoy!

12.09.2011

Boredom Buster

***Be sure to check out Keri's Guest Post at Darling Doodles***

It has been really cold at our house, which means that our 2 (very active!) boys have been stuck inside and we are all driving each other a little crazy. This is actually something that my grandma would let us do when we went to her house and we always loved it. 

All you need is a rimmed baking sheet, pint mason jar, a straw, dish soap and water. 
Fill the mason jar about half way with water (I used warm water because it is softened and makes TONS of bubbles) then add a generous amount of liquid dish soap. Place the mason jar in the middle of the rimmed baking sheet and start blowing with the straw. Make sure and remind them to BLOW not suck. My 2 year old did a great job and I think he only tasted bubbles once before he realized that it was for play not eating.

 The bubbles will spill over the side and they can see how tall they can get them to be or who can make the biggest bubbles. The bubbles on the baking sheet will eventually pop and then you can carefully dump the soapy water back into the jar and do it again.


12.02.2011

Christmas Wreath...

I love decorating for Christmas, it is my favorite holiday, and I like to do a few new things every year. This week I worked on this wreath to put above our fireplace. It was really simple and worked up pretty fast.

Here's what you need:
Hot Glue Gun and Glue
Cardstock or Cardboard for wreath base
Scrapbook paper (I used 4 sheets of double sided Christmas paper)
Large Circle Punch (or scissors and patience)

The first thing I did was make my base. I had originally dreamed this wreath would be made on a foam wreath form. Unfortunately, the store I usually get them from doesn't carry them anymore and the next closest store is and 1 1/2 hours away. So I improvised. I used a piece of heavy brown cardstock. I used a large dinner plate to trace the first line and then a bowl for the center line. Then I just cut it out with my scissors.
 Next you need to make the 'leaves'. I used a large (3 inch-ish) cirlce punch. You could free hand cut them if you are patient enough or use a craft cutter. The punch worked great for me. I cut a large circle first.


Then slide the circle back into the punch, but only part way to make the leave shape. I could get 3 large leaves out of each circle or 4 smaller ones.


To give the leaves shape, just pinch one end of the leaf. Then start gluing leaves around the outside of the wreath edge.
 This is how the first layer looks around the outside edge.
 The second layer I flipped the leaves the other way and glued them in bunches of 2 leaves and then 3 leaves. Layer 4 was the same direction as Layer 1, but I put the leaves on an angle overlapping the the previous one. And the last Layer, over lapped the previous leaf and then I folded just a little bit under and glued towards the back of the wreath.


And here is the finished wreath!. I hung it with a thin gold wire to the front of an antique cupboard door and then set it on our mantel. I hope you all have a fun time decorating and creating for Christmas!

11.18.2011

Organizing Our Home: The Linen Closet

The Linen Closet is really a multi-purpose closet at our house. The sheets live here, as well as tableclothes, my coupon file, candles, and our family games. (Sometimes extra toilet paper, as you can see). But on my quest to be more organized, I had to tackle this closet and to tell you the truth I usually just close it and walk away.

I will make a confession, I hate folding sheets! The fitted sheets never turn out the same size as the matching flat sheet and they never look nicely folded. And then when someone goes looking for something (or climbs the shelves to try and get to the games) and sheets come falling out or they get stuffed back onto the shelf! Ugh, I just hated this closet!

So here is the BEFORE picture. EEK! How embarrassing!
 And the AFTER! Much better. So here is what I did. I first got this idea from here, which I found via Pinterest and then I have tweeked it to my own needs. The blue baskets are from Dollar Tree, yes the dollar store! Our store had a couple other colors, but I like the blue/turquoise best.
 I actually rolled on the sheets and pillowcases so that they fit into the round baskets and looked nice and neat. 
The labels were made with white cardstock, a $1 stamp set from Walmart, $1 ink from Walmart, and Jute Twine that I actually got for another project for Christmas (I'll share it later, of course if it works). I didn't want my tags to be too perfect and so I just stamped and inked the edges, then tied them on.
 Here is a close up. And these are the supplies from Walmart. 

I hope this inspires you to tackle your linen closet too. What is your secret for keeping a linen closet organized?

10.28.2011

Organizing Our Home: The Mail/Filing Center

I hate mail clutter, it drives me crazy and yet it is always there! But I am determined to stop it and here is our solution. A small 'Mail Center'. Our home is a split entry, so you open the front door and you are on a small (really small) landing and you can either go upstairs or downstairs. There really isn't any room for anything right there, so I had to move my solution to either the kitchen at the top of the stairs or the living room. The kitchen has been the drop zone for everything and it drives me crazy, so I am trying the living room, on top of the blue dresser I painted. 

I simply found a small filing box at Walmart, hanging folders and manila file folders. Labeled them and stuck them in. Unfortunately, the green of the hanging folders is really ugly and this is my living room, so I grabbed a piece of my favorite scrapbook paper and made a little slip-cover for the first file. I didn't even have to cut the paper, because the file was exactly 12 inches across and I just folded it to match the length. I can swap it out anytime I want a change, but it is much cuter than the army-greenish hanging folder.

The basket next to the file I have had for a long time and it has floated around the house trying to find a home.  It is divided into sections and works perfectly for holding some supplies needed at a Mail Center/Living Room. I put my can of febreeze spray in one spot, the address book, thank you cards and envelopes, sticky notes, 3x5 cards and my piano lesson calendar. This is also where I keep our bill paying envelope. 

It is simply a zipper pouch, I found this one on clearance for 10 cents at Walmart. Inside is everything I need to pay bills; check books, stamps, pens, and the chart where I keep track of our expenses and paid bills. It is so nice to slip the bills into the TO BE PAID folder and then on Friday, grab the folder and this pocket and I am all set... no searching for the check book or rummaging for a pen that works.

Now, you probably noticed that I DO NOT keep pens in the little basket out in the open. This is why.... He is 2 and likes to write "lists" and his "name" on everything, including his face, the walls, the couch, the windows, the tablecloth.... Hope you have a wonderful and safe weekend!