12.30.2010

Grocery Bag Holder

As I was struggling to come up with ideas for homemade Christmas gifts, I stumbled across a tutorial for a grocery bag holder and thought of my mother-in-law. She has an abundance of grocery bags and no place to store them so I decided to make her one for Christmas. This idea comes from one of my favorite crafty blogs Make It and Love It. For the grocery bag tutorial and instructions... Go HERE.


This project was so simple and cute that I decided to make two more as gifts for other people. Originally I planned on saving all my grocery bags and stuffing them full so that the recipients would already have a bunch of bags for it.... but, I forgot. I now have hundreds of grocery bags piled in my garage and I gave out all my grocery bag holders. Hmmm, I guess I will be making another for myself very soon.

12.24.2010

Free Coupon Class....

Because of the response I have gotten about couponing and saving money....
I have decided to start teaching FREE COUPON CLASSES! If you are interested in hosting a class for your friends, family, neighbors, as a bridal shower, church group etc. Please email me: magenkeller@hotmail.com

The classes will be totally FREE, I will show you exactly how I get, file, and use coupons and answer any questions you may have.

(Remember when I posted about this....and I paid only $37. 53?!?)
I hope you all have a safe and wonderful Christmas!

12.20.2010

Couponing 101... FAQ

I appologize for not  making this post earlier, our family has been plagued by some HORRIBLE stomach bug, I will spare you the details, but know that I am sorry and we are doing better.

I received a few questions after my last post on couponing:

What newspapers do I get?
 It doesn't really matter WHAT paper it is, as long as they deliver the sunday coupons. I live in Utah and I get the Deseret Morning News and the Salt Lake Tribune. I know that some local papers offer the Sunday coupons, so I would contact your them and ask.

Do I need to get the paper everyday?
No, the only newspaper we really care about (at least for couponing) is the Sunday paper. Most newspaper companies offer a SUNDAY ONLY or WEEKEND ONLY. Ask for it and I would ask for a deal, you can probably talk them down on a newspaper subscription.

How many papers should I get?
For Couponing, it is best to get ONE paper for each person in your household. So, if there are 4 people in your house, it would be ideal to get 4 papers. Most newspapers won't let you subscribe to more the 4 or 5 papers, but the more papers you get the more coupons you have. Remember, you can use one coupon per item. So, if you have 4 coupons you can buy 4 items.

What if the store brand is cheaper?
Then BUY it! I personally don't get caught up on the brand. I buy what I can get for the least amount of money. For example: I had a coupon to buy Fleischman's Yeast, with the sale and coupon is made the yeast about .76 per strip. Which is a good deal, but when I got the store the Kroger brand yeast was on sale for .52 per strip. So I bought that kind instead. No big deal, I saved even more money.

Let me know if you have any other questions.
Happy Couponing and Saving $$$

12.11.2010

DIY Play Kitchen

I am sooo excited about this post I can hardly contain myself! While browsing through some crafty blogs a few months ago, I ran across this idea. Most of my inspiration for the project came from THIS one and THIS one, but there are plenty of examples if you do a google search. You turn this simple two drawer nightstand...


Into THIS! A totally awesome play kitchen! Are you amazed?! :) Keep reading...

Here are some of the supplies you will need to complete this project. And the prices are listed next to it.

A two-drawer nightstand... we bought it at DI for 15$.
An old faucet... bought on ksl.com classifieds for 10$ (Search under the word "faucet")
A funky bowl... or you could use a square cake pan. 2$ at DI
Wooden coasters for the burners, painted black. 10$ at Bed, Bath, and Beyond
Handle, hinges, chain... 10$ total at Home Depot or any hardware store
Thick wooden dowel for hanging the curtain... FREE, my grandpa had one lying around.
Curtain material... too cheap to figure in. :)
Paint... 15$ at Home Depot
Extra piece of wood for backsplash... FREE, my uncle had wood lying around.
Knobs to go into backsplash (not shown)... 5$
Velcro to secure oven door... 1$

Total Cost: about 70$, a steal in my opinion, but you could make it even cheaper if you had an eye for good deals. You could paint burners on, use an upside down wooden letter J for the faucet (as seen in other tutorials), or go cheaper on the paint and hardware. I personally love the real faucet and burners though. Okay now for some pictures along the way. These instructions won't be incredibly detailed but it's easy enough to figure out I think. If you have questions, let me know.

Start by knocking the sides off the drawer you plan on using for the oven.

Draw a circle to fit your bowl. I recommend getting a bowl with a pretty good size lip on it so you have some wiggle room.


From here, there was A LOT of sanding. Fortunately it didn't take near as long with four people helping and plenty of sanding tools. Much thanks to my gracious uncle and cousin who were so happy to help us!

It looked like this after all that sanding.

Now for my big contribution! Painting!


Cutting the wood piece for the back splash. After this, we nailed it to the back, let the paint dry overnight, and added all the hardware: hinges, handles, faucet, bowl, burners, etc. We used silicone caulk to secure the bowl and a nail gun to keep the burners in place.


To hang the curtain, we drilled a hole through one side of the nightstand and slid it in. We then drilled a small hole on the other side to secure it. Slide your curtain on and then put wood filler in the small hole on the side. Re-touch the paint.

That's it! We plan on adding knobs to the backsplash and some velcro in the oven to keep it shut tight. I admit the project was quite a bit more work than say... going out and buying a play kitchen... but I am so happy with the end project and hopefully my kids can pass it down to their kids!

If any of you readers decide to make one, please send me pictures! I would love to see what you came up with.

12.10.2010

Couponing 101...

This is a really LONG post, but I needed to explain a little bit so hang in there with me.
I would LOVE to answer any specific questions you may have, so please leave a comment if you have a question.

A few weeks ago I posted about how I have been shopping with coupons on our family's blog and I had a lot of comments asking how I do it. So I decided that may be a great topic to blog about here. First let me show you the end result:
Here is a shopping trip from about the first week on November.
This is everything purchased: 2 Gallons of Milk, 2 Liters 7up, 2 Liter A&w's, 4 Bags of Ricola Cough Drops, 1 bunch of bananas, 12 Yoplait Yogurt Cups, 4 Microwavable Soup Bowls, 18 cans Chunky Soup, 1 Sour Cream, 4 lbs. Cheese, 3 boxes of Noodles, 4 boxes of Jello, 2 Boxes of Granola Bars, 10 Cans Swanson Broth, 8 cans Crm of Chicken soup, 3 colgate toothpaste, 1 (75ct) Clorox Wipes, 2 Loaves of Bread, 2 refill packs Pampers Wipes...... My total before my coupons was over $150 (gulp, that is over budget)....But after my coupons I paid......


$37.53! (WOW! I know!)

This week I bought:

2 Gallons of Milk, 2 (3qts. each) Clorox Bleach, 1 roll Bounty Paper Towels, 3 Bottles French's Worsechire Sauce, 2 big boxes Rice Chex, 2 boxes Honey Nut Chex, 1 box Mom's Best honey Nut Toasty O's, 1 box American Beauty Pasta, 2 pkgs. Hershey Chocolate Chips, 2 pkgs. Heath Bits, 4 Pkg Betty Crocker Cookie mix, 2 pkg. yeast, 2 boxes Huggies wipes, 1 box Chamomile Tea, 1 box Ronzoni Pasta, 2 boxes Christmas Lights, 1 blistex, 6 Cartons Greek Yogurt, 3 pkg. Bumblebee Tuna, 2 boxes Kleenex Tissues, 4 Yakisoba Japanese Noodles, 3 pack Wilton Cookie Cutters, 1 pkg Rubber Gloves....
and the total before coupons and fresh values $115......

After Coupons and Fresh Values: $46.85

So, How did I do it?
The first step is SAVE your Coupon Packets.
There are coupon packets that come in the Sunday Newspapers. There are Smart Source (SS) Packets, General Mills (GM) Packets, Proctor & Gamble (PG) Packets....

Then there are the Red Plum (RP) Packets that come in the mail.

When a coupon packet arrives take a Magic Marker and write the date on the front. That's all you do right now and put it in your file.

I file my coupons by type of packet and by month. I label my files like this:
SS (Smart Source) NOVEMBER
SS DECEMBER
SS JANUARY
etc.
PG (Proctor & Gamble) NOVEMBER
PG DECEMBER
etc.

How easy is that?

How about we get to making our list and going to the store....
the real trick to all this is this site:


When you go to this site you first choose the State you are in. Then you choose the store you want to shop at. It will bring up that store's current ad. Along the top of the spreadsheet your will see a START button. Click start.

Now look through the spreadsheet, when you see something that your family is in need of you click on it and it will be highlighted. Once you have made it all the way through the spreadsheet your go back to the top and click the SHRINK button. The spreadsheet will shrink to only the items you have selected.

Now hit PRINT.
Now you have your grocery list. I usually hand write the few things at the bottom, like Milk if it isn't in the ad or anything extra we need that week, like Christmas Lights.

The with your grocery list in hand you can clip your coupons.
There are multiple columns on the list the first one shows you STARS. Everything listed in the ad is rated by stars, letting you know how great of a deal it is.

The next column tells you exactly what the item and what size is on sale. The next column show you the price it is on sale for.

The FOURTH column tells you exactly which coupon to clip.
It will tell you: exactly what item the coupon is good for, how much it is good for, expiration date in ( ), then where to find it.
For example:

Nestle Tollhouse Refridgerated Cookie Dough, $1/1 (12-31-10) RP-10/3

So to find this coupon I would go to my October Red Plum File. Find the packet labeled 10/3 and then clip my coupon.

When I have clipped my coupon, I then will write on my shopping list how many items I need to purchase. (Because some coupons require you to purchase more than 1 item).

Now simply go to the store and purchase what is on your list.

***The real trick to couponing is knowing this: YOU CAN USE ONE COUPON PER ITEM PURCHASED.***

12.09.2010

Kid's Apron

This year for Christmas, I decided to make all my gifts. I am not quite sure what I was smoking when that thought came into my head. :) But I went and bought all the material and supplies right after that moment of craziness and so I was kind of stuck with my idea.

One of the biggest projects Ben and I took on was a play kitchen for our kids... post forthcoming! To go with that gift, I made these easy and adorable reversible aprons. Don't you just love that fabric too?! It came from JoAnn Fabrics.


I was going to post directions and more pictures but my photographer, ie husband, was too busy studying for finals. So... you will just have to use the tutorial that I found. It was a great set of directions though and I probably would have just confused everyone.

The tutorial is by Joanna Armour at Stardust Shoes. Go HERE for the instructions. She also has a super cute tutorial for a chef's hat. Go HERE for that. I may just have to try that one out too.

11.29.2010

Diaper Holder


Well since I have a few friends and family members that are expecting babies, I wanted to make them something cute that they could use. These diaper holders are great for quickly grabbing diaper and wipes all in one.I found the idea here.

What you will need:
Sewing machine
Thread
Fabric

Fabric you will need:
Sixteen 4X4 squares
Two 5 wide X 8 long (you will fold this piece in half, long ways)
Eight 4X4 squares of flannel to add thickness and color
Two 2 1/2 wide X 8 long of flannel to add into the top pieces

(I bought 2 fat quarters of the pink and orange, 1/3 yard of the green, 1/3 yard flannel, and 3/8 yard of the brown and I made almost 3 holders)


Layer each of the squares for sewing. The bottom will be the inside of the holder, lay face down. Then add flannel and the top piece. For top piece lay flannel in between the fold.

The Lil' Luna blog has a good example of how things are supposed to be sewn together.

After you have your squares laid out in the order you want them sewn them together, take the bottom 2 squares and sew them together with 1/2 inch seam allowance. You want the seam to be on the outside. Then match the top 2 squares together and do the same thing, be sure to keep the seams open. The top strip will then be attached to the top blocks.


Repeat these for side 2.

Sew the 2 sides together with 1/2 inch seam allowance, leaving the seams open.


Clip the seams about 1/2 inch apart. Once you wash it, the ends will start to fray and it will look like a rag quilt.


The case can hold 4-6 diapers or 2 diapers with a wipey case.

11.18.2010

Color Coded Bookcase....

I LOVE books! And because I love them so much I have A LOT of books. Which is wonderful, but it does cause me a lot of trouble when trying to organize my bookcase in a pleasing manner.
Then I had a thought....COLOR CODE it! I love to color code things (I even color code me and my husband's closet, I know I might need help).
So, if you are like me and need to change something up every now and then, try color-coding.... doesn't that look nice? (Now I know I need to get more Yellow books)

11.17.2010

FREE Thanksgiving Printable....

Remember the SUPER FUN printable for Halloween? Look at what Jessica has put together for Thanksgiving?! I just love the look of the burlap. Head on over to her blog to have one for your home and remember to tell her Thanks!


11.16.2010

Giveaway WINNER!

Thanks to everyone who entered our Giveaway! According to random.org.... our lucky winner is #1.
And who is #1:

aprilhoyt said...


It's adorable!! I want one! (my email is hoytphotography@yahoo.com) I am a follower already.


Congrats! Keep checking us out for more fun ideas for you home and more giveaways!

Paper Bag Turkey Tutorial

Last week for our Young Womens at our church we were making centerpieces for a Thanksgiving Dinner we do every year for some of the people in our ward. One of the ladies I serve with came up with this idea and it was so fun and EASY!
These Turkeys turned out so cute, this is definitely something you can make with the whole family.

What you need:
paper bags
scissors
rubber band
candy corn (I found mine on a SUPER discount at the grocery store)
pipe cleaners
google eyes
crayons (or paint if you are brave)
hot glue gun


1. Cut the bottom out of your bag.
Now you have a paper tube.


2. Then cut your bag down the side.

3. With your bag opened up flat, you can now decorate your turkey. We used crayons (he probably would have been more excited if I had gotten out the paints, but I wasn't brave enough this day).

4. Now crumple it up, smash it, open it up and do it again. This helps your bag have more texture and easier to work with without ripping your bag.
5. Take a scoop, about 1/3 cup of candy corn and put on your bag. (I also used dry black beans for this part, this is the "guts" of your turkey, my boys really liked playing with the turkey guts such boys)

6. Gather your bag up around your guts and secure with the rubber band.


7. Now straighten out your turkey tail and figure out which way your turkey stands best.

8. Take your pipe cleaner and fold in half, then take the top, twist together and then roll it to make a turkey head. Twist the bottom/neck part together too.


9. Hot glue your neck & head on. Then add your google eyes and I cut the tip off a candy corn to make the beak.


10. You are done, find a place to line up your flock of turkeys. We made quite a few and took them to Grandparents.

I hope your family has as much fun as we have with these turkeys!

11.10.2010

Dinosaur Cape Tutorial & Giveaway!

I came up with this cape for Halloween for my boys, it is light-weight so it is easy to move in and simple to make. Here’s how...


Here’s what you need:

(1) Fat Quarter or 18 inch x 22 inch piece of fabric

(1) 9x12 inch piece of felt
(1) 37 inch Bias Tape (this will be the top of your cape and the tie, so you can measure your little one and decide what length you will need)

Coordinating Thread

1. Cut out your dinosaur spikes out of the felt. I used spikes because that is what my boys wanted, but you could also use smooth bumps like ½ circles or really spikey spikes. For this one I made a paper template that was 3 ¼ inch x 3 ¼ inch x 3 ¼ inch. I needed about 6 spikes of this size to go all the way down the back of the cape. Set them aside.

2. Now we move to the ironing board. On the 22 inch side of your fabric, fold toward the wrong side about ½ inch of fabric and iron, then fold and iron it over again. This hides the raw edge and keeps it from unraveling. Do this to the other side as well. (As a side note I am totally embarrassed by my ironing board! I will be making a new ironing board cover very shortly)

3. Now take your fabric and fold it in half RIGHT SIDES TOGETHER lining up those nice edges you just made and iron.


 4. On the sewing machine, stitch down the 22 inch sides that we ironed.
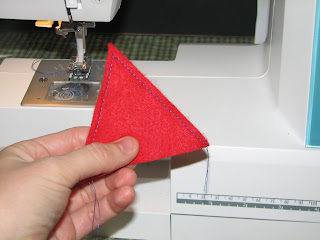
5. (This step is optional so if you don’t want to you really don’t have to.) You can take each of your spikes and top stitch.

 6. Align your spikes in the crease we made when we ironed the fabric in half and gently fold the fabric back over. Carefully pin each spike. Stitch down this folded seam with a ½ inch seam allowance. Then Stitch again with a ¼ inch seam allowance to reinforce the seam.


 7. Now roll the bottom edge toward the WRONG SIDE ¼ inch and then roll again and iron. Now Stitch this edge.
8. Sew a gathering stitch along the top edge of the cape. Gentle pull thread to gather the top of the cape until it measures about 9 ½ inches.
 9. Find the middle of your bias tape and line that up with the spikes of the cape. Carefully pin bias tape along the top edge of the cape, hiding the raw edge inside the bias tape.
10. Stitch along the edge of the bias tape.


11. And you are all done! I hope you have as much fun pretending with your little ones as I have had with mine.


Wouldn’t this make a fun Christmas or Birthday Gift? Well, you could WIN one! That’s right I’m going to be GIVING AWAY one Dinosaur Cape.

Just leave a comment (with your email) to enter. Want another entry? Become a Follower and leave another comment. Good Luck! Giveaway ends Tuesday November 16, 2010.