Showing posts with label baby. Show all posts

11.15.2011

Baby shower gifts

I don't know if you've heard of Pinterest but when I heard about it my original thoughts were that it was another Facebook social network that I did not want to get involved in. (I currently face a Facebook addiction) However, I did take a look and was instantly hooked. A couple days into looking around on Pinterest I came across baby shower gift ideas. I love making baby shower gifts and this soon followed-


The first gift, Ice cream in a bowl is just little wash cloths. I tried to use a blanket but it gets too thick at the bottom. I wrapped them around one another and secured them in place with scotch tape.
The flower bouquet was made with baby socks and onesies. The bottom of the bouquet is wrapped with a baby washcloth.

Thanks to Pinterest I'll probably be posting more baby shower gifts in the future, I hope you enjoy making these!

4.28.2011

Nursery Decor....

The other day while blog surfing I came across some different ideas for decorating a nursery and I thought I should share about our nursery. We decorate our nursery for our first son, but it has endured a second and I can totally imagine it shifting with a baby girl ( I am not announcing anything, I just know what I would do to make it girly.)


The first thing we did was PAINT! When we moved into our house this room was Lavender.... precious, but not for my son. I painted the walls Sweet Pea Green and then we tore up the floor (it was a lovely thick carpet in Teal). We installed (well mostly my husband) laminate wood flooring to match our crib and then re-did all the trim.

I had an idea of what I wanted the tree to look like, but I totally lacked the confidence and know-how to actually paint it on our wall, so, I hired my husband's cousin who paints and she painted our beautiful tree complete with our birdies. I absolutely LOVE how our tree turned out.

Next I put up vinyl lettering above the closet. My sister had this poem in her nursery and I loved it:


Cleaning and scrubbing can wait till tomorrow, for babies grow up we've learned to our sorrow.... So quiet down cobwebs, dust go to sleep, I'm rocking my baby and babies don't keep.

I made the pillow cover for the rocking chair and the skirt under the crib (which is reversible to match the pillow). Framed some little baby feet and our nursery was good to go. Hope this inspires you to do something fun with your nursery! Tell me what fun things you have done (or wish to do) with your nursery, I would LOVE to hear your ideas!

Linking up HERE.

1.14.2011

Free Printable....

I just fell in love with adorable printable! So cute! Just click on the picture to be linked to Craftily Ever After to get one for yourself or as a SUPER CUTE gift.....

11.29.2010

Diaper Holder


Well since I have a few friends and family members that are expecting babies, I wanted to make them something cute that they could use. These diaper holders are great for quickly grabbing diaper and wipes all in one.I found the idea here.

What you will need:
Sewing machine
Thread
Fabric

Fabric you will need:
Sixteen 4X4 squares
Two 5 wide X 8 long (you will fold this piece in half, long ways)
Eight 4X4 squares of flannel to add thickness and color
Two 2 1/2 wide X 8 long of flannel to add into the top pieces

(I bought 2 fat quarters of the pink and orange, 1/3 yard of the green, 1/3 yard flannel, and 3/8 yard of the brown and I made almost 3 holders)


Layer each of the squares for sewing. The bottom will be the inside of the holder, lay face down. Then add flannel and the top piece. For top piece lay flannel in between the fold.

The Lil' Luna blog has a good example of how things are supposed to be sewn together.

After you have your squares laid out in the order you want them sewn them together, take the bottom 2 squares and sew them together with 1/2 inch seam allowance. You want the seam to be on the outside. Then match the top 2 squares together and do the same thing, be sure to keep the seams open. The top strip will then be attached to the top blocks.


Repeat these for side 2.

Sew the 2 sides together with 1/2 inch seam allowance, leaving the seams open.


Clip the seams about 1/2 inch apart. Once you wash it, the ends will start to fray and it will look like a rag quilt.


The case can hold 4-6 diapers or 2 diapers with a wipey case.

7.20.2010

Diaper Cake

I saw this idea at a baby shower many years ago and have added my own twist on making my own diaper cake. These can be very elaborate or very simple. This diaper cake was made for a little boy, I find that it is easier to go all out on trinkets and additions with girls.

First I take one diaper (size 1 or newborn) and I roll it up and tape it (scotch tape is easiest). One bag of 50 diapers is sufficient for a whole cake.
Next I take another diaper and wrap it around the first diaper and tape it. I continue to roll diapers and tape them to the previous diaper until I have the roll size I like. The bottom layer I use about 25 diapers, the middle 18, and for the top I use 7. I've tried more even numbers but this seems to be the best combination. (I am a little obsessive compulsive about the numbers being 25, 15, and 10 but it just doesn't work as well). 
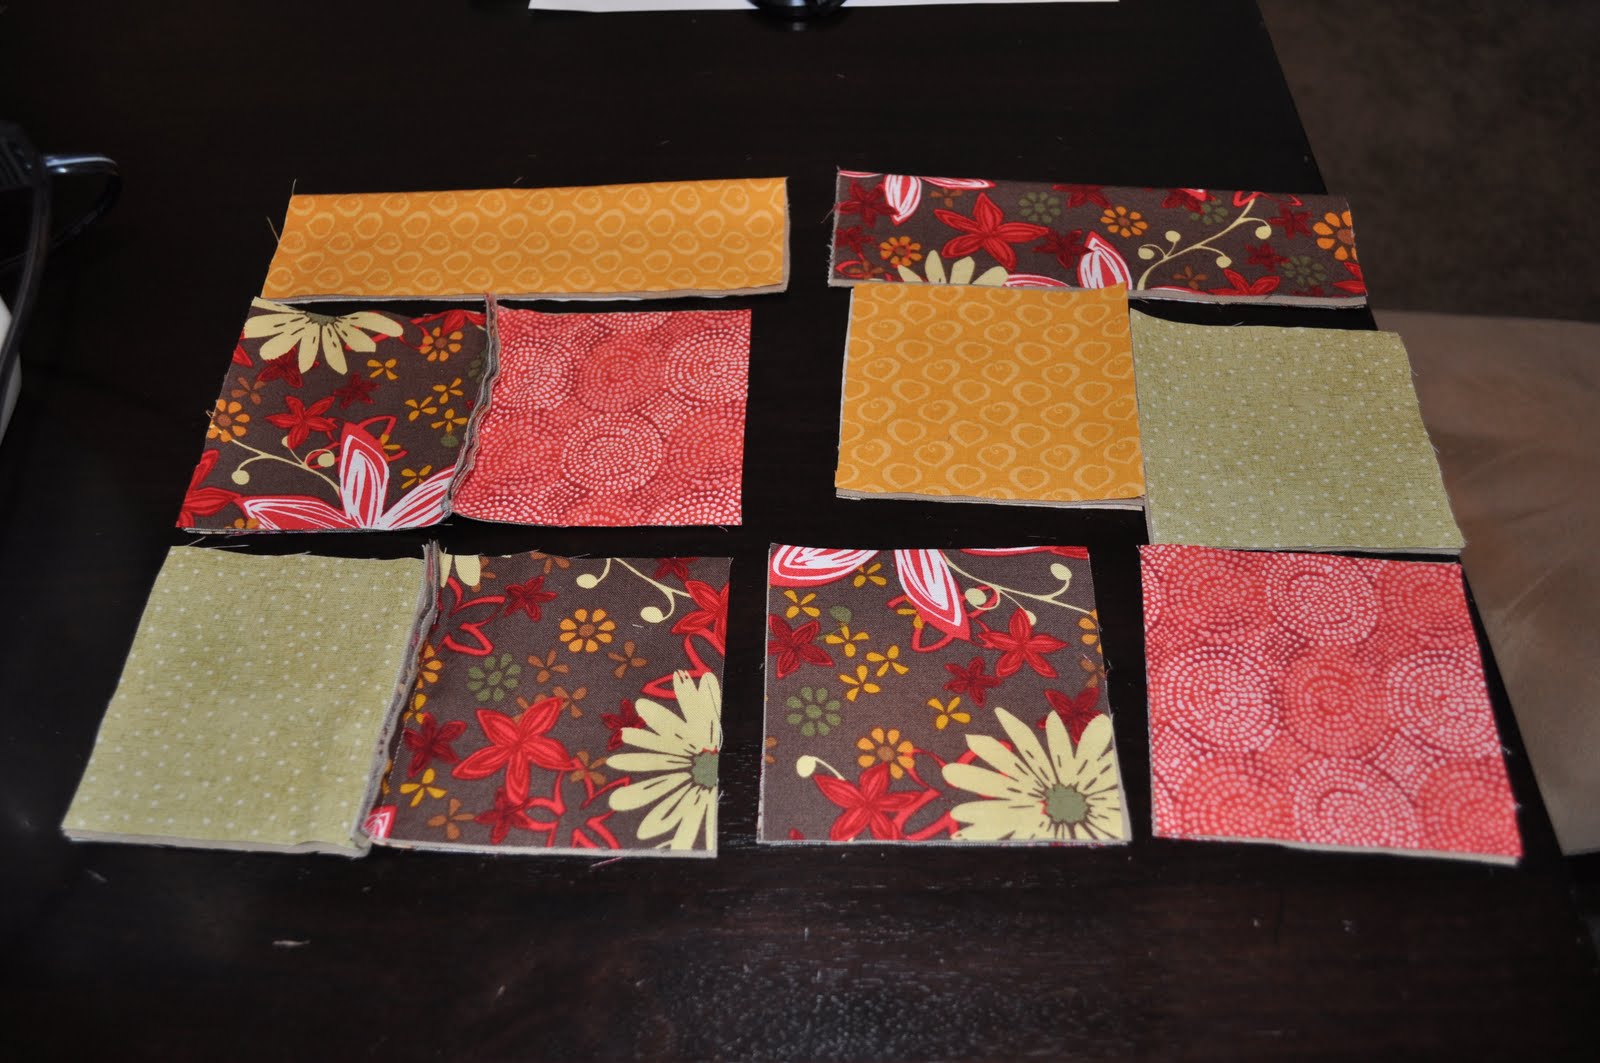
After I have rolled all my cakes I take 3 different materials that I've purchased at the store (Joannes and walmart sell small quilt squares for about 1.00(Wal-mart)-3.00(Joannes)$. Joannes has a greater selection. I take the top layer first and wrap the material over the diapers and pin it at the bottom with my finger and then glue with a hot glue gun. It is a bit tricky and I've burned myself every time I've made a cake. I pull the material several times and glue it until I get it looking the way I desire.
For a final touch on the layer I put a fat ribbon around it. (Usually this color coordinates with my fabric)
Continue this step with the other two layers. After the cake is complete I stack it just the way I like it and add extra fun stuff for the baby. (Additions for the mother are also a good idea.)

The last cake I made was for a little girl and I included a play cell phone and play jewelery-very fun!

After everything is added I take cellophane and wrap the cake and tie it with the same ribbon I used to tie around each cake layer.


6.17.2010

fabric flowers

I have fallen in love with making fabric flowers as hair accessories or as a brooch. I learned to make the traditional silk flower or ribbon ones awhile ago and I love them, but I have been wanting to branch out and find different, more interesting ones. Just searching the internet for fabric flower tutorials will give you TONS of ideas if you fall in love with it as much as me. This week, my cousin came over and we made these three different designs. I didn't list my own instructions on how to make these because I figured visiting the already made tutorials would be easier.

The first idea came from Rhonna Designs, check out her tutorial HERE... I seriously LOVE these flowers! I made two for me, one for a friend, and one for my mother-in-law. I am so excited to wear it. Not only is it gorgeous, but it's cheap and SUPER easy.


The second flower comes from Sew 4 Home, the tutorial for this one is HERE... I love the shabby chic look of these flowers. I have seen several different versions of this flower but this one is my favorite. I think it would look so cute as an embellishment on a bag or just as a cute hair clip. My only complaint about this one was that it was a pain to sew together. I skipped the sewing halfway through and just super glued it to some felt backing. SOO much easier.


Finally, I found the idea for this little clip at The Creative Crate, tutorial is HERE... I personally think her clips are much cuter than mine so check it out. I made this one for my daughter's hair and she loves it. A cute variation of this clip is to get satin fabric and burn the edges, similar to the first flower. Then layer between pieces of lace. I love that idea but I didn't have any satin fabric.

So there you have it, three new flower clips. I got a brooch, a purse embellishment, and a hair clip for my daughter all in one day. It has been so fun making them, I definitely want to try some more.

6.05.2010

Heat Press Vinyl

I LoveLOVELove Vinyl. It is so easy to decorate with, easier than painting, comes in so many colors.... But now I have found something so fantastic in the world of vinyl... Heat press Vinyl. It is different than your regular vinyl, but once you cut it (in any shape you would like) you can apply it to fabric with your iron and then it is stuck there, just like screen printing (but without the ink!)

I have been experimenting with making t-shirts and personalized dish towels, but unfortunately we are having a problem with uploading today... so here are some pictures and a tutorial about heat press vinyl...


(Picture taken by Vanessa @ V & Co.)

For a great vinyl tutorial also by Vanessa @ V & Co. go HERE

5.26.2010

Baby Bibs


I started these bibs two and a half years ago, when my oldest was just starting solid foods. I'll just sum it up by saying they sat in the closet for a long time. I finished them up yesterday. These are the kind of bibs we had for my sister growing up. They work for little babies clear on up through toddlers. And the cover everything, not just the shirt collar.

I simply took kitchen and bath towels. Cut a circle in around where the neck should go (I used a bowl to cut an even circle). Lined it all with bias tape, made button holes, and sewed on buttons.
I made a lot...but it did take me nearly 3 years.
My cute models.

And speaking of sewing, here is a shout out to my friend. I won this cute apron on one of her give-aways. She is always doing fun crafty things to improve her home. Go visit her blog. Thanks Abbey!

4.08.2010

Our first giveaway

As a way to kick start our new blog, we will be giving away these adorable newborn baby booties. I know lots of people are often in need of a last minute baby shower gift idea, so even if you don't have a baby, enter and give them as a gift! If you would like to win these cute little things, leave a comment below and you will be automatically entered to win.


Additional entries will be given for:
  1. Blogging, Facebooking, or Tweeting about this giveaway – please leave separate comments with the link.
  2. Being or becoming a follower of this blog. - leave a comment saying you became a follower.
Winner will be announced April 17th! Good Luck!

-Megan